
Whether you're cross stitching, making friendship bracelets, or trying your hand at actual embroidery, having a big wad of tangled embroidery floss can really dampen the fun.
By a lot.
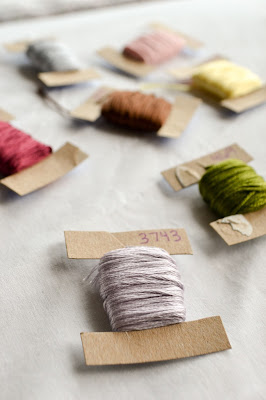
To avoid this problem, the simplest way is to wind the floss around some spools before you start.
If you already have some real spools, then feel free to wind the embroidery around 'em and go on your merry way. I've done that before and it looks so cute!
But if you don't have enough (or any) real spools, then making cardboard versions is a great option. To teach you how to make 'em, I've got a tutorial with lots of pictures.
Happy stitching!
____________________
HOW TO ORGANIZE EMBROIDERY FLOSS


SUPPLIES:
- Thin cardboard (I've found that cereal box cardboard works well!)
- Scissors
- Embroidery floss
- Pen (optional, for writing the color's number)
- Tape
DIRECTIONS:
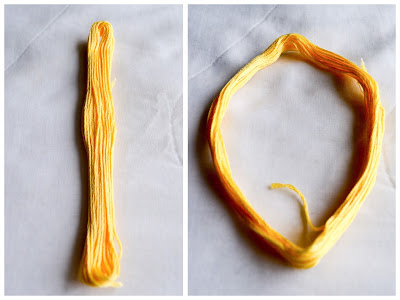
4. Carefully slide the paper off the paper off the embroidery floss and lay it flat (left).
5. Then, find the center and unfold it into an oval/circle (right). Now (hopefully!) it should unwind easily without becoming a tangled mess.


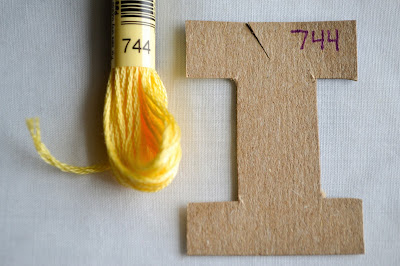
1. Cut a piece of thin cardboard into the shape of a capital "I".
2. Make a little, slanted cut on the top of your spool.
3. If you want to remember the color's number, write the number beside the slit you created.

5. Then, find the center and unfold it into an oval/circle (right). Now (hopefully!) it should unwind easily without becoming a tangled mess.

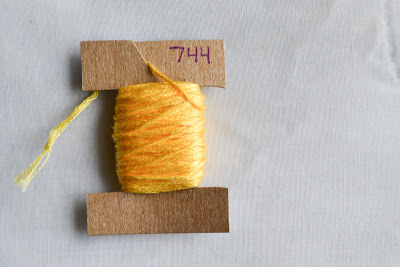
6. Tape one end of the embroidery floss to the spool like shown.

7. Wind the embroidery floss around the spool.

8. Tuck the end of the embroidery floss into the slit you created earlier.
9. You should now have a nice, organized spool of embroidery floss. See how easy that was?

____________________
No comments:
Post a Comment